Wednesday, March 11, 2015
HF backpack radio
so I built an HF backpack setup

it is on an aluminum frame with an aluminum plate pinned on the back
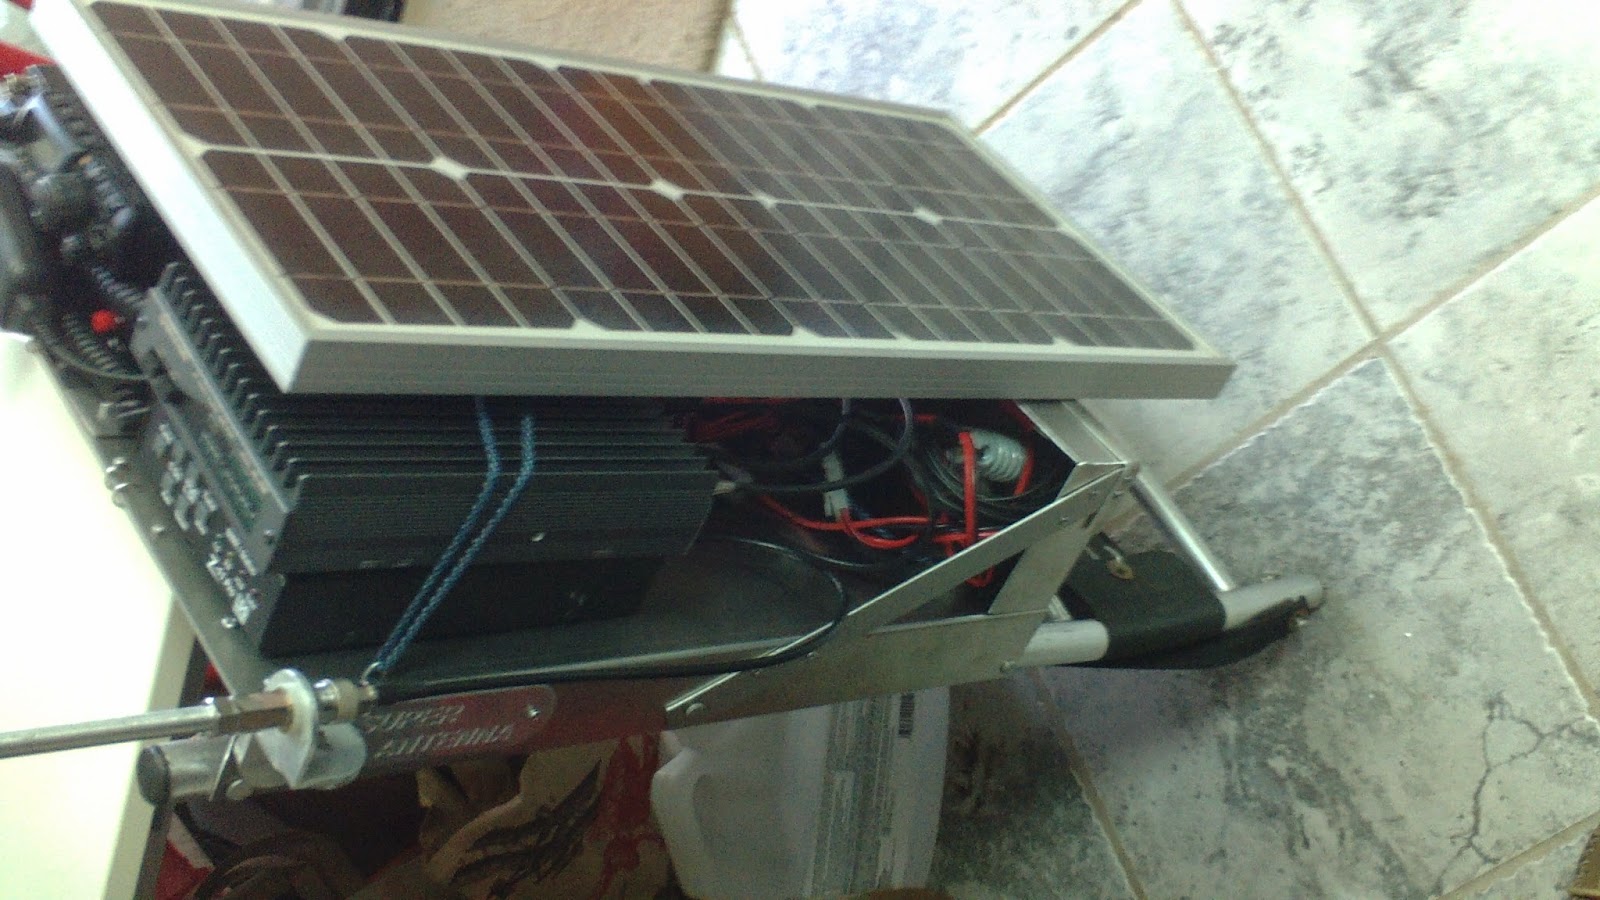
I have a 20W solar panel on the back covering the hardware,
the radio hardware is
Yaesu FT-817
Tokyo Hy-Power HL45B
LDG Z-11pro
Mirage B-34-B
I have a super antenna mount mounted on the side of the pack
have the rest of the super antenna to use, but not sure if I will just use the hamsticks...
also have a 12AH 12V VRLA battery, and solar charge controller
this gets me all modes
45W on HF and
34W on VHF and
5W on UHF
all for 33 pounds, not so bad on a frame backpack
but I wanted more,
so I added my pelican case with my VX-7R and a few accessories like a lighter socket output that has a power pole connector so I can charge my mobile phone from the system, a few other small antennas, and that is about it.
I wanted the case on the back for 2 big reasons,
the setup stands up on it's own with the case attached,
and if it starts to get wet, I can put the radios, amps, tuner, and charge controller in the waterproof case (this is where I use to store them)
but it brings the total weight to 43 pounds, and that is a bit much for me to carry
I walked outside with it, found a few people talking on 40M, and called CQ for about 10 min. and got no reply, but it did appear to be working, it was a radio blackout time due to a solar flair (found that out later)
so band conditions were less than ideal, I will try again in a few days
the weight issue is a big deal
I am thinking I need to use the pelican case for something else at this point
and might remove the 2M amplifier, not that it is that heavy, but also not sure it is that safe to transmit 34W that close to me anyway, but mostly want it for SSB work, so it is not like it is constant output, but that may not matter, I just don't know
now it is picture time.
here is about what I started with, an old aluminum backpack frame and my radio hardware in a
pelican case
 here is the bent aluminum attached to the frame
 the back side with the straps attached on the back
 placing the hardware to see what fits where
 added some bracing for the shelf (braces are aircraft aluminum, not the bendy kind the rest is made of)
 here is the top holder for the solar, not fantastic, but it works (made of 3 CB radio mounting brackets)
 here are the mounting points for the radio hardware,
I wanted them to be easy to remove and not stick up high enough to hurt any of the hardware
 and the back side of them (that little plate is aircraft aluminum again)
 then I tested the hardware fit, and all seemed well
 here it is almost all done, antenna mounted on the left side
 and with the solar
 maybe a better view of the antenna mount
 I can fit quite a bit on the small shelf, the antenna stores on each side sticking up through the mounting ropes
 I added cleats to tie the pelican case and the bottom of the solar panel to keep it from shifting
 here is about the best view I have of it all done, all wired up, but without the solar on it
 top view
 that is all
it is on an aluminum frame with an aluminum plate pinned on the back
I have a 20W solar panel on the back covering the hardware,
the radio hardware is
Yaesu FT-817
Tokyo Hy-Power HL45B
LDG Z-11pro
Mirage B-34-B
I have a super antenna mount mounted on the side of the pack
have the rest of the super antenna to use, but not sure if I will just use the hamsticks...
also have a 12AH 12V VRLA battery, and solar charge controller
this gets me all modes
45W on HF and
34W on VHF and
5W on UHF
all for 33 pounds, not so bad on a frame backpack
but I wanted more,
so I added my pelican case with my VX-7R and a few accessories like a lighter socket output that has a power pole connector so I can charge my mobile phone from the system, a few other small antennas, and that is about it.
I wanted the case on the back for 2 big reasons,
the setup stands up on it's own with the case attached,
and if it starts to get wet, I can put the radios, amps, tuner, and charge controller in the waterproof case (this is where I use to store them)
but it brings the total weight to 43 pounds, and that is a bit much for me to carry
I walked outside with it, found a few people talking on 40M, and called CQ for about 10 min. and got no reply, but it did appear to be working, it was a radio blackout time due to a solar flair (found that out later)
so band conditions were less than ideal, I will try again in a few days
the weight issue is a big deal
I am thinking I need to use the pelican case for something else at this point
and might remove the 2M amplifier, not that it is that heavy, but also not sure it is that safe to transmit 34W that close to me anyway, but mostly want it for SSB work, so it is not like it is constant output, but that may not matter, I just don't know
now it is picture time.
here is about what I started with, an old aluminum backpack frame and my radio hardware in a
pelican case
I wanted them to be easy to remove and not stick up high enough to hurt any of the hardware
# posted by space @ 8:35 PM 
![]()
